Showing posts with label Pin Cushion Thread Catcher. Show all posts

Thursday, July 20, 2017

12 Days of Christmas in July, part 2 & Giveaway #2

Welcome to my 2nd post for Sarah's 12 Days of Christmas in July blog hop.  Here are the blogger posts for today (besides Sarah's and mine).

Thursday, July 20th

 
Sarah is having a great giveaway of Tula Pink's new holiday line, BUT, you have to comment on all the blog posts in the giveaway to enter.  

Last blog post, I showed you 4 different projects.  I have another 4 projects for you today.  At the end, there is another giveaway.
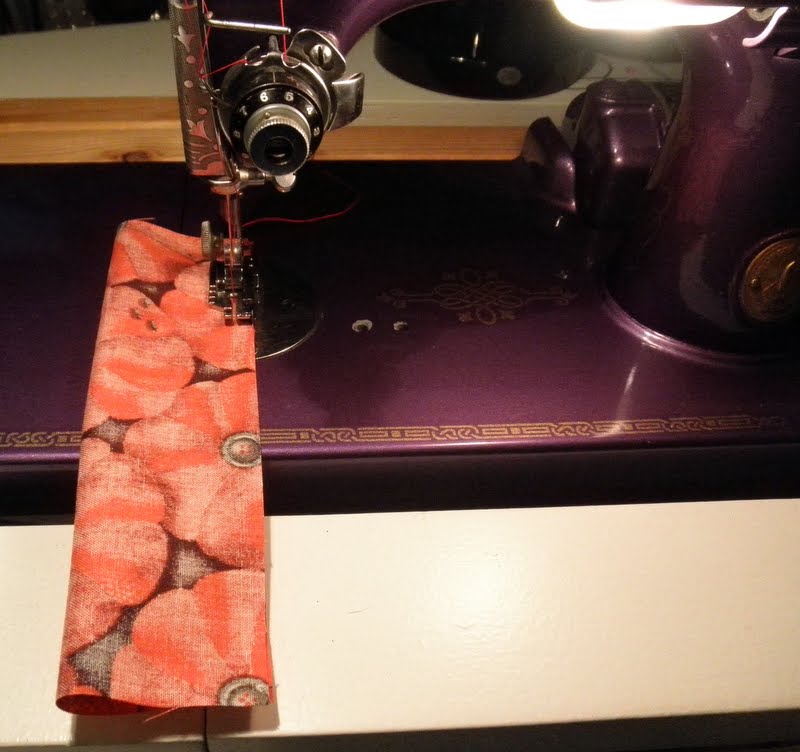
#5.  Project Bags:
 
Project Bags are a great idea for crafters.  Knitters/crocheter can put their yarns and needles in a bag, to take with them.  They are great for sewing/quilting projects, too.  In May, I made 10 different project bags, and, last week, I started another 14 project bags.  I've already given some away, and several of the new project bags will be given away, too.  


  Those are just a few of the project bags I made in May.  
 
The pattern I used makes 4 different sizes, but, I've only made the largest size so far.  Here is the link to the pattern
 
These bags, in different sizes, would be great for kids, too.  Make a large one to hold Barbies, and a smaller one, to hold all of those Barbie accessories.  What about toy cars, or action figures?   These would be great for packing items, too (lingerie, etc).  
 
 
#6.  Pin Cushion Thread Catchers: 
 
These are very popular.  I've made several dozen over the years, and I only have one left, that isn't in use.  They are all over my house.  It's time to make another dozen, I guess.
a few I made last summer


pin cushion thread catcher, with matching sewing machine mat
 
These are great for stitchers, or for other crafters.  I've given them to scrapbookers, too.  They are a big hit at my family reunions.  I never go without a couple, and never come home with any.  I have a tutorial on this blog post.  Like I said, I usually make about a dozen at a time.  Really easy to chain piece.
 
Here are a few more that I've made.
pin cushion thread catchers


#7.  Table toppers/Table runners:

Who doesn't have a table or end table?  Table toppers and Table runners can be used in many places.  I have one in my sewing room, under my ruler holder.

I've made these for gifts, and even taught my beginning quilting class how to make them.  Many I've designed myself.  Just find a block you like, and create around that block.

They can be seasonal:
 
2 that I designed for my beginning quilting class

I went crazy and made over 40 Sixty degree table runners for gifts one year.  I only have one left (for me).
snowmen


Here are more ideas:


I have a tutorial for this one here.


#8. Placemats:

Who doesn't need placemats?  I use them everyday!  My little quilt guild makes 100 placemats for Meals on Wheels every Christmas (one side holiday, the other side neutral).

Last year, I made placemats for my Secret Sister.  Her kitchen is decorated in Roosters.
Guadalupe's placemats
 I'm working on some camper placemats for my brother, to put in his 5th wheel.  Sorry, these are not finished.

 
 You don't need a pattern to make placemats.  Design your own!  Standard placemats are 14" x 18".
 
OK, here is today's giveaway!
extra large Project Bag
PLEASE, read the rules below.  I've had so many people comment that are no-reply commenters.  I've added a message to each of those, below the comment they made on my previous post.  
 
*Here are the Rules!  First, if I can't reach you, you lose out, so, PLEASE, when you leave a comment, make sure your email address is included.  I can NOT reach Google+ commenters, and No-Reply commenters.  If I don't reply to your blog comment within 48 hours, then I can't reach you.  Try again, with your email attached.  I'll draw a winner on July 26th, after the blog hop is over, to give everyone a chance to comment.  You do NOT have to be a follower to win.  If you can't comment on my blog, look under my profile, at the top of the blog, and my email address is there.  Send me an email, and what blog post you are commenting on, and I'll enter you in the contest.  See, EASY!  Also, I reply to every comment that has an email attached, since I think comments are IMPORTANT.  
Good luck!  


Thursday, June 16, 2016

Last of the Pin Cushion Thread Catchers, etc

I did a demo on pin cushion thread catchers at the Michigan TOGA last weekend.   I had 7 different pin cushion thread catchers, in various stages of completion.  Well, I've finished all 7 pin cushion thread catchers.  There are NO unfinished pin cushion thread catchers at my house.  Yipee!  That means I've completed 18 pin cushion thread catchers THIS YEAR! (some were started last year).

Here are the last 7 pin cushion thread catchers.
so you can see the pin cushion parts

so you can see the thread catcher part
Two of these were for the Ugly fabric challenge from the Michigan TOGA.  I had made sewing machine mats with my ugly fabrics, and the pin cushion thread catchers were 'bonus' projects.  I didn't finish them before the TOGA, since I needed them for the demo.  Here are my completed Ugly fabric challenge projects.
sewing machine mat and pin cushion thread catcher #1
sewing machine mat and pin cushion thread catcher #2
I am showing them with my 1927 Singer 15 hand crank, that I made them with.  Our projects were supposed to be made with a 'people powered' sewing machine (treadle or hand crank). 

I found I need 10 more string blocks to make my pillow cover to go with my Tulip Fields quilt.  They are half done.  I want to get these finished, and stitched together, so that I can take the quilt to the longarm quilter. 

What are you working on this week????

Tuesday, June 7, 2016

Slow Stitching Sunday (and Monday and Tuesday)

I finished some UFO's, finally.  I started some pin cushion thread catchers way back, last year, when I taught a class at my little quilt guild.  I'd done everything that I could do on a machine, but, I still needed to add the sand/walnut shells, and stitch them closed.  I also needed to stitch closed the opening in the thread catcher part, where you turn them right side out.  Really easy, but, I just never got around to doing it.

On Sunday afternoon, my son helped me add the walnut shells (sand for a few of them) to the pin cushion part.  I've been stitching them closed ever since.
9 Pin Cushion Thread Catchers, finished
All 9 of these are done now.

On Sunday, I also made up some 'demo' pin cushion thread catchers, in various stages of assembly.  I'll be doing a demo at the Michigan TOGA on Saturday.

I have a tutorial on how to make these on my blog.  Since I only printed out the instructions, without pictures, I figured I needed some examples to show the steps. 

I'll have 6 more pin cushion thread catchers to finish, by the end of the weekend. 

Some of the pin cushion thread catchers will be gifts, some will be sold at my family reunion (there are always requests for them). 

Sunday, January 31, 2016

Pin Cushion Thread Catcher Tutorial

pin cushion thread catcher

Usually, when I make these, I make several at at time.  These are very popular at my Family Reunions, with all the stitchers.

Supplies Needed:
1 Fat Quarter for Thread Caddy
1 Fat Quarter for Pin Cushion
1-2 cups Play Sand or Crushed Walnut Shells
19"-20" Package Strapping
Non-Slip Shelf Liner

Cutting Directions:
Thread Catcher Fabric - cut 2 - 9"x18" pieces
Pin Cushion Fabric - cut 2 - 6"x8" pieces, cut 1 - 4"x7" piece for straps
Non-Slip Shelf Liner - cut 1 - 3.5"x6" piece

USE 1/4" SEAMS!

Walnut Shells
 You can get this at pet stores. 

Package Strapping
Ask at stores if they have any strapping that they haven't thrown away yet.  I usually get mine at Sams, or, hubby brings it home from the office.


Strap Construction:
Fold 4"x7" strap fabric, right sides together, and stitch on the 7" side.

stitch along the 7" side
Turn right side out and press seam along the center.
Cut strap in half, creating two 3.5" straps.  Lay aside.
cut in half
Pin Cushion and Lining Construction:
Layer lining fabric to wrong side of the pin cushion fabric (I use the same color fabric for both parts).
lining fabric against wrong side of pin cushion fabric

Place shelf liner along one 6" end of pin cushion fabric. Place both straps, seam side against top of shelf liner, about 1" from the edges, and baste.
pin shelf liner & straps (seams against shelf liner)

baste along edge (less than 1/4")

Fold straps in half and pin (see picture below).  This will keep them out of the way when you zig zag stitch the other end of the shelf liner to the pin cushion fabric (I use a straight stitch machine, so, I stitch 2 lines of stitching instead of using a zig zag).
Pin shelf liner to fabric in several places, since the shelf liner will want to 'walk' with your sewing foot. *(You can also put a piece of paper over the shelf liner, making sure to tear it off after you have stitched the end.  The paper will only tear easily if you straight stitch, not zig zag).  **Make your stitch length small so that the paper tears away easily.
pin well, since the shelf liner 'grabs' your sewing foot

stitch close to edge of shelf liner

**you can use paper along the edge, so that the shelf liner doesn't 'grip' your sewing foot
Fold pin cushion fabric, right sides together, to measure 4"x6".  The straps will be on the inside.
Sew all three sides, leaving a 3" opening along one 4" side.  This is where you will place the sand at the very end of constructing your project.
leave a 3" opening on the side
Turn right side out.  Set aside.
top of finished pin cushion

bottom of pin cushion
Thread Catcher Construction:
Fold one 9"x18" piece of bag fabric, right sides together, and stitch along the 9" side, creating a tube. 
stitch along 9" side
Press and refold so seam is centered along the back.
seam centered along the back
Sew along the bottom edge.

sew along bottom edge
Square the bottom by bringing the bottom up to the side seam, creating a triangle.  Mark seam line.
bring bottom up to the side seam

measure 1.5" from the point, mark the line to stitch
 
stitch along line
Trim to 1/4".

trim to 1/4"
Repeat with the other side.
bottom of bag with boxed ends

turn right side out.
Repeat with the bag lining, leaving a 4" opening along the center of the long seam.
leave 4" opening in center of seam


Pin right sides of straps to right side of lining, along the back.  Baste.
right side of straps against right side of lining (piece with open seam)

baste (less than 1/4" from edge)
Place outer fabric inside lining, right sides together, matching and pinning raw edges.  Sew.
pin right sides together, lining up seams

pin well

sew

sewn seam
Turn through opening in lining.  Press seam.
press seam

press seam
Insert package strapping.
insert strapping thru unstitched seam

Pin strapping WELL!
pin well before sewing
Sew as close to the edge of the strapping as you can, starting and stopping at the back seam, by the straps.
stitch close to strapping
Stitch lining closed by hand.

Fill pin cushion with sand.  Sew the opening closed by hand, using small stitches.
*I find it easier to fill if I use a funnel.

You've finished your pin cushion thread catcher.  Enjoy!
finished pin cushion thread catcher

 **I use a straight stitch machine.  I have a 1/4" foot  for my machine.

regular foot, and 1/4" foot
I switch between both feet for this project.  If you look closely at the pictures, you can tell which foot I'm using.  The regular foot is great for basting close to the edge (less than 1/4") and for stitching close to the strapping.


s