A friend asked me to make her a table runner. This is what I came up with. I still need to quilt and bind it.
Scrappy Midnight Pinwheel Table Runner
14' x 38"
 |
| longways |
 |
| sideways |
I saw this block, but, it was too small. I also only wanted to use 3 colors, not 4.
 |
| 6" block (too small for what I needed) |
 |
| my design |
I re-drew the placement diagram, since I was using scrap fabrics. (yes, I actually used some of my scraps, don't faint)! I used 3 different maroons, 2 different greens and 2 different tans.
 |
| placement diagram |
A - 11 2.5" squares (maroon #1)
B - 12 2.5" squares AND 6 3.5" squares (green #1) (label these separately)
C - 12 2.5" squares (tan #1)
D - 6 3.5" squares (maroon #2)
E - 24 2.5" squares (tan #1)
F - 12 2.5" squares (maroon #3)
G - 12 2.5" x 4.5" rectangles (green #2)
H - 10 2.5" x 10.5" rectangles (tan #2)
Sew:
1. Grab 6 (B) and 6 (D) 3.5" squares.
On back of 6 (B) squares, draw a diagonal line, 1/4" from corner. *I use a Quilters Rule. Just line up the wholes in the middle, across the diagonal, and draw a line on either side.
 |
| Quilters Rule |
 |
| draw a line on either side of Quilters Rule |
 |
| lines drawn |
 |
| ruler method, line on points, draw 1/4" past line |
Putting right sides together, stitch along both lines.
 |
| stitch on both lines |
Iron open. Trim down to 2.5" square (I used my Bloc Lock ruler).
 |
| trimmed and squared to 2.5" |
2. Grab 12 (G) 2.5" x 4.5" rectangles, and 12 (B) and 12(C) 2.5" squares.
Draw a diagonal line, corner to corner, on the wrong side of the 2.5" squares (both (B) and (C).
Place (C) 2.5" square, right sides together, on the left corner of (G) 2.5" x 4.5" rectangle.
Trim corners, 1/4" past seam.
Iron open.
Repeat with (B) squares, but, putting them on the right side.
 |
| angle your line correctly |
Make 12 Flying Geese units.
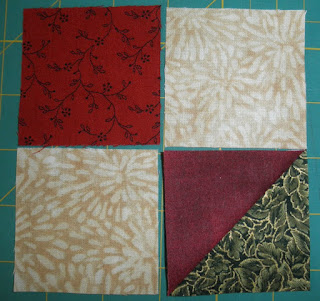
3. Grab 1 (F), 2 (E) and 1 (D/B) HST unit. Sew into 4 patch units.
Make 12 of these units.
4. Lay out 4 patch units, Flying Geese units and 4 (A) 2.5" squares, following the pattern picture.
 |
| placement diagram |
 |
| units placed, following diagram |
Sew in rows. Iron each row, following arrows.
 |
| iron following arrows |
 |
| finished unit |
5. Sew (H) 2.5" x 10.5" rectangles to 2 opposite sides of completed block.
Iron long strips away from block.
Makes 3 units.
6. Sew (A) 2.5" square to either end of remaining (H) 2.5" x 10.5" rectangles.
Iron towards long strip.
7. Sew above units onto 2 opposite sides of the 3 completed blocks.
Make 2 units.
8. Sew the 3 units together, with the partial unit in the middle.
9. Baste, quilt and bind as preferred.
Finished table runner top.
I wrote the tutorial for my beginning quilting class. I doubt most of you would need such simple instructions. I hope you like the tutorial.


I saw that block, too. I like your version better. It is always fun to use scraps!
ReplyDeleteWhen it comes to planning, graph paper is my best friend. In that way, we work the same.
ReplyDeleteA real cute tablerunner. You did an excellent job on your tutorial. Very detailed and easily followed. Scraps are the only way these days.!
ReplyDeleteLovely scrappy table runner and nicely done tutorial!
ReplyDeleteCute table runner. Love the fabrics you used. I agree graph paper is much easier.
ReplyDeleteGreat tutorial. I do like your color and layout much better. The finish looks very good!
ReplyDeleteWhat a nice, detailed tutorial! Any quilter should be able to follow your instructions. I'm a graph paper user too. Taking time to learn EQ would slow my quilting down.
ReplyDeleteGreat tutorial! And a great table runner - love what you have done with the green. I, too, draft my patterns by hand. I have considered EQ a number of times and I'm just not sure it's worth the money and time to learn it. Oh, I love my Bloc Loc ruler - I think that would be a great help for beginners to square up HSTs. ~Jeanne
ReplyDeleteI like how you changed the placement of colors in this block. Much prettier than the original. Just looking at the original pattern, I would not have wanted to use this block. But definitely would like to use it now that I've seen yours.
ReplyDeleteI love this block, thank you for sharing!
ReplyDeleteLove the tutorial and the table runner. Very festive. Thanks for sharing the tut with us.
ReplyDeleteHugs
I'm trying this again. Google, I want my comments back in my inbox!!!!
ReplyDelete