Showing posts with label hand crank. Show all posts

Thursday, June 16, 2016

Last of the Pin Cushion Thread Catchers, etc

I did a demo on pin cushion thread catchers at the Michigan TOGA last weekend.   I had 7 different pin cushion thread catchers, in various stages of completion.  Well, I've finished all 7 pin cushion thread catchers.  There are NO unfinished pin cushion thread catchers at my house.  Yipee!  That means I've completed 18 pin cushion thread catchers THIS YEAR! (some were started last year).

Here are the last 7 pin cushion thread catchers.
so you can see the pin cushion parts

so you can see the thread catcher part
Two of these were for the Ugly fabric challenge from the Michigan TOGA.  I had made sewing machine mats with my ugly fabrics, and the pin cushion thread catchers were 'bonus' projects.  I didn't finish them before the TOGA, since I needed them for the demo.  Here are my completed Ugly fabric challenge projects.
sewing machine mat and pin cushion thread catcher #1
sewing machine mat and pin cushion thread catcher #2
I am showing them with my 1927 Singer 15 hand crank, that I made them with.  Our projects were supposed to be made with a 'people powered' sewing machine (treadle or hand crank). 

I found I need 10 more string blocks to make my pillow cover to go with my Tulip Fields quilt.  They are half done.  I want to get these finished, and stitched together, so that I can take the quilt to the longarm quilter. 

What are you working on this week????

Saturday, May 21, 2016

Bonnie Hunter Part 3

Friday was the Happily Scrappily Irish class with Bonnie Hunter.
Bonnie Hunter by her Happily Scrappily Irish quilt
 It was fun to see all the different ways everyone was putting their quilts together, fabric wise.  Susan sat across from me, and Sharon sat behind me, with her Featherweight and Featherweight table.  Us vintage machine girls stuck together ;)
Sharon with her Featherweight and table
Susan and I, at our tables
I love how Susan is making her quilt (it's RED).  She also carefully chose her center piece and surrounding red pieces in the scrappy blocks.
Susan's red blocks, see the 'cross' in the center of the scrappy blocks?
We all had fun sewing together today.


I took a hand crank to this class.
1927 Singer 15 hand crank
 I got several blocks put together, but, for some reason, the pictures didn't come out.  Today was Ladies Crafting day at church, so, I had Kelly take a picture with me and one of my rows.

the row I completed at the workshop
I worked on this quilt at Ladies Crafting day, today, too.  I got lots accomplished.
this is how my rows will look

this is what rows I've done so far (lots more to do)
I got about 15-20 more scrappy blocks done today.  The alternate blocks were done before the workshop.

finished blocks, so far
This is all I have left to turn in to scrappy blocks.  The box is starting to look empty now.
what I have left to assemble
I'll meet up with Bonnie in the morning, and pick up my Singer 301A and table, that she is borrowing.  Bonnie has also gotten lots of sewing done these past few days.  You can see her posts here, here and here (so far).

I hope that everyone else is having a great week, too!


Thursday, April 30, 2015

Leg Lamp quilt

My stepfather loves A Christmas Story movie.  (I haven't watched it since it came out, decades ago).  Melvin has a Leg Lamp, like in the movie.  When I came across a paper pieced Leg Lamp, I just had to make one for Melvin.  Sarah made her Leg Lamp into a pillow.  I made mine into a wall hanging.
I used black netting on the leg (it makes it harder to keep the leg fabric flat), and I used velvet for the top of the stocking.  My fringe is shorter than hers, so I can see the top of her leg peeking out.  I ironed over all the different fabrics with no problems (except the fringe).

I hand quilted black stitching along the seams of the lamp shade.  I also quilted in the ditch along her leg.  I didn't think it needed any more quilting than that, since it is only 8" wide, and 20" tall. 
hand quilting on lamp shade

Other than the hand stitching, this was made on my 1959 Singer Spartan hand crank sewing machine.

I made 2 of these (I have a tendency to make multiples of things).  That way, Melvin will get his Leg Lamp, and, after I finish the binding on the 2nd one, I'll have something to put in my quilt guild's quilt show next March.  I usually give my quilts away, and seldom have anything to put in the show.

My 2nd Leg Lamp looks like this:
2nd Leg Lamp, showing backing fabric
Melvin will be getting this in May.  I hope he likes it. 

Saturday, March 21, 2015

Modern Block Exchange

I am participating in a Modern block exchange with my Treadle On group.  I don't usually make modern style quilts, but, I liked this block.  I've only made one set of blocks so far. 
first block made
 Here is a set of blocks, trimmed.  I still need to sign these blocks.
1 set of Modern blocks for exchange
I will be making more of these blocks.  We have to use Kona 'Ash' as the background color, but, we can use any bold color(s) for the strips.  I'm using some of the fabrics from my son's wedding quilt for my bold colors. 
more strips, ready to be stitched into Modern blocks
Of course, since this exchange is with my Treadle On group, the blocks must be made on a 'people powered' sewing machine.  I'm using my 1959 Singer Spartan (192K) hand crank. 
1959 Singer Spartan (192K) hand crank
I think I need to make a set on my blue treadle, Victor, too.
Post WWII Japanese treadle
We're headed off to another quilt show, shortly.  This one is in Princeton, IL.  We are also going to check out an new quilt store in La Salle, IL. 

Have a great weekend!

Thursday, March 5, 2015

Intertwined, It Just Keeps GROWING!

I wrote about all the Oops! while working on my youngest son's wedding quilt, Intertwined, in my last post.  Boy has this quilt not turned out quite like I planned.  No, it wasn't the pattern's fault.  Jean wrote up a great pattern, and I like it so much, that I may make this again, one day.  All the problems have come from me, redrafting her pattern, and making several stupid mistakes.

Well, I mentioned in the last post that I made the Half Square Triangles/HST's (512 of them) the wrong size.  See, my mistake.  I'd already cut the center strips the correct size.  Oh well, I cut new center strips, to match my HST's ( I was NOT going to trim down 512 HST's).  (Once the HST's are made, the blocks go together very quickly).

The original blocks were supposed to be 9.5" unfinished (9" finished). My new blocks should have come out at 10.5" unfinished, (10" finished) but, they came out 10.25" finished.  How did that happen?  Yes, I have 1/4" seams (I checked).  See, it keeps GROWING!  This quilt top should have finished at 88" x 98" with the borders added.  Instead, it finished at 94.25" x 105.25".  That is a LOT of growth! 

Here is the finished top.  Sorry for the bad pictures.  It was bad weather outside, and I didn't have any other place to put this huge quilt top.  This is on my queen size bed.
finished wedding quilt top

finished wedding quilt top

finished wedding quilt top
As I mentioned in the previous post, I'm using all my 'mistakes' on the back of the quilt.  Well, another 'mistake' was made.  I was planning on using the white on white on the back of the quilt, but, I didn't have enough.  I don't remember where I got that material, and, since I got it almost a year ago, I didn't figure I could find it again, anyways.  I'm in a rush, too, to get this to the long arm quilter, so that it will be finished before the wedding.  Ok, change of plans.  I decided to use the Kona black on the back instead.  Oops!  While figuring out about how much I'd need, I found that I didn't have enough of the Kona black, either.  Hubby and I made a quick trip to Joann's and bought the last of the Kona black. 

Well, if the front of the quilt kept growing, then the backing had to grow, too.  I had LOTS of extra blocks, and center strips from the front of the quilt to use on the back.  I also had a few extra HST's, that I turned into pinwheels (I love pinwheels).  I used EVERY 'mistake' on the back!  I finished the backing last night.  It's HUGE!


backing on my queen size bed
I should have gotten a picture from the side, since you can't see all the colorful strips on the front.  Oh well, I'll get good pictures when it is quilted.  I like the back as much as I like the front of the quilt. 

Oh yea, EVERY STITCH of the quilt top and the backing were sewn on my 1959 Singer Spartan hand crank sewing machine.
1959 Singer Spartan hand crank
This quilt will be delivered to the long arm quilter on Friday.  She has some great ideas for the quilting and the threads for this quilt.  I'll start making the binding soon.  I have great material for the binding.  (Oops, no picture of the binding, sorry). 

Thursday, January 23, 2014

I couldn't resist, really!

I started off being a good girl on Tuesday.  I went to the Quilts of Valor sew-in, and stitched away.  The trouble started when I left.  I haven't been to either of the thrift stores in that town since late summer.  How could I resist? 

Nothing special at the first store, just a few DVD's.  I went thru the second store, and, was almost thru the whole store, with NOTHING in my basket, when, I turned the corner to the very back of the shop.  Oops!  I saw a cabinet.  I ignored the cabinet, and looked at everything else in that area.  That cabinet kept calling to me.  I finally uncovered it (yep, covered in other stuff so you couldn't see what was under there).  I had to pull the cabinet out, so that I could lift the lid and see what was inside.  A dusty, Singer 66 with a motor, and really bad wiring. 

This Singer 66 has decals unlike any other Singer 66 that I own (yes, I own several Singer 66's).  My birthday is coming up soon, so, I decided that I needed to get myself a present.

My latest Singer 66
The cabinet isn't in the best of shape.  They even had tape on the side to keep the piece that supports the lid, inside, out of the way.  There was tape (clear and masking tape, both) on the base of the machine.  Yuk!  The stitch lever is painted a weird white color, too.  I've never seen one painted before. 

I borrowed a screwdriver from the guys in the back of the shop, and proceeded to give this machine a 'motorectimy' right there.  Boy were these guys surprised!  I then unscrewed the machine from the base before they loaded it in my car.  They didn't know I could do that, either. 

On Wednesday, I decided that this machine needed to be cleaned and tested.  Here are some of the before and after pictures.

what's left of the tape that crumbled when I tried to remove it

the serial number dates this to an allotment of 35,000, started September 30, 1941

told ya it was dirty, you should have seen under the motor area

before cleaning
Except for the tape removal, this was a pretty simple cleaning job.  I had to let the sewing machine oil set on the tape area to soften the remaining glue.  It worked pretty well, along with my fingernail.

see how shiny the metal is after a nice cleaning

this part was the hardest to clean.  I don't think it had ever been cleaned or dusted back there where the motor went

my new Singer 66 hand crank in the cabinet
I wiped the cabinet down with Murphy's Oil Soap, but, it still needs more cleaning, and some Old English Stain remover applied.  Maybe today.

top AFTER cleaning.  Wow, what did they do to this????
I even found a great spool pin doily for this machine. 

spool pin doily
Here is an example of the wiring, and why I didn't even mess around with it.  The guys at the shop offered to plug it in for me, until I showed them these wires. 

see where the wiring is split open????  Eek! 
I tested the stitches on this machine, and, after a few minutes of playing with the tension, she sews nicely.  Sorry I didn't get pictures of the stitching.  I think this one is going to stay in the cabinet, and head up to my sewing room. 

Thursday, January 2, 2014

Dec 2013 NewFO's

This is the last post for the NewFo's for 2013.  Barbara, over at Cat Patches.  Check out all the entries here.

Barbara will be continuing with her NewFO party in 2014. 

These are my NewFO's for December.  I had lots of finishes in December, but, not many new projects.  My finishes are on my previous post, here.

My father in law has his doctorate in physics, and was a professor for over 30 years.  I found this pattern for him, over at Doodle ee doo' blog under her free patterns.

paper pieced Atom block
This took me a few days to make.  It has 161 pieces in the paper piece pattern.  It was easy to quilt, since I only quilted along the black border, then, in the grey part of the Atom. 

The other new project for December is for a friend of mine.  Yes, I know Hanukkah is over.  I celebrate Christmas, so, she gets a Christmas present from me instead.  I found this pattern a while back over at Whims And Fancies blog, under the free patterns.  Her pattern measures at 5.5 inches.  I enlarged it to 7.5 inches.  It went together really quickly, and has alternate pieces, in case you don't want the candle in the middle of the star. 

paper pieced Star of David block


I made both of these on my favorite hand crank sewing machine.

1959 Singer Spartan hand crank
I have found that paper piecing on a hand crank is super simple.  The needle stops exactly where I want it to stop, while it tends to stitch an extra stitch or two with my electric machines. 


Tuesday, October 29, 2013

Connor's Quilt top (Finally)

My youngest son graduated high school back in May 2012.  He didn't decide what quilt he wanted until that Spring, before he graduated.  I'd found a block, way back when I was first learning how to quilt, in the Winter of 2001-2002, and thought it would be easy (it wasn't) and bought enough material to make both my son's a quilt, using this block.  Well.... as someone who had never sewn, and was just learning how to make a quilt (I'd only  just finished my first quilt, 13 inches square, and all by hand) I found out that I was trying to take on way too much at that stage.  I cut out all the pieces and tried to sew them together, properly.  Grrr!!!!  I had to rip out and re-sew every single piece more than once.  Grrr!!!!  After making one block, I showed it to my boys, and told them that they wouldn't ever get this quilt, sorry.

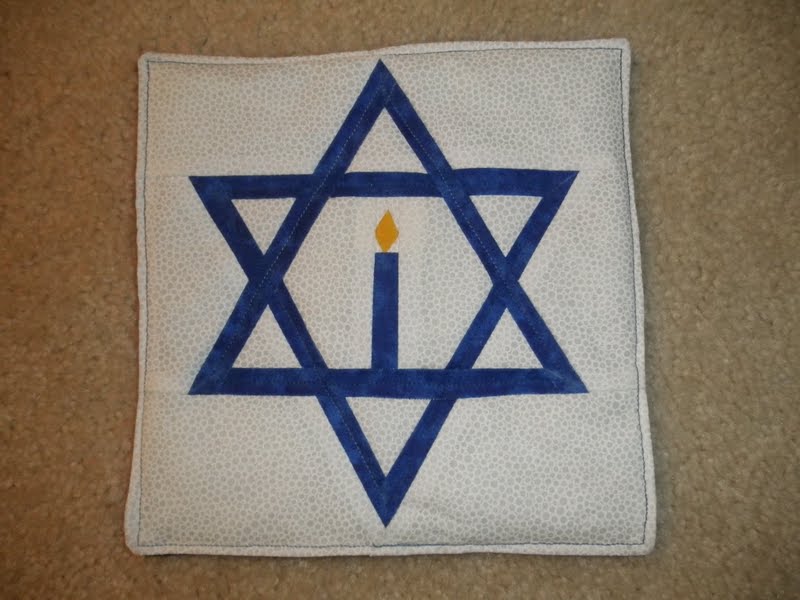
First block ever made
Yes, I know, this block looks pretty easy, but, it is NOT for beginners!  This block started teaching me how to place my 1/4" seam in the correct place, and how to trim blocks to make them square.  I wish I'd had a teacher, or, an experienced quilter to get help from, but, the lady from my church who'd taught us the mini quilt (by hand, not machine, no less) had gone back to work, and the other ladies in the group were still meeting, but, didn't know any more than I did at that point.  That is why I abandoned this block/quilt.

Skip to Spring 2009, when I asked my oldest son what he wanted in a quilt for his high school graduation.  He didn't want a quilt in his college colors, or, any other quilt, he wanted 'that quilt' for his dorm bed.   Oh no! 

Well, if I was going to make that block, I was going to string piece the blocks and make enough blocks for both boys.  I found that pattern and the stencils that I'd made, way back when, along with all the fabric that I'd bought.  I made enough blocks to finish one whole quilt, and left the other blocks, since I still had 3 years before the youngest one  would graduate.  This is what I came up with for the oldest son.

Christopher's quilt
Since I've never made a pillow sham for Christopher, I have 14 blocks left (including the original block made).  I figured that would be plenty of blocks to make another quilt for Connor, when the time came.  Well, guess what!?!?!  When the time came, Connor didn't want those blocks in those materials any more.  He still wanted 'that block' but, he'd picked out several fabrics the summer before (he was going to make a quilt, but, never found the time), and he wanted me to make 'that block' in his fabrics, BUT, he didn't want the same setting, either.  He wanted everything offset and slightly wonky, and HE wanted to design his quilt. 

Ok, Connor decided what fabrics went where in the blocks, then I cut them up and sewed them together.

Connors blocks, waiting for the next step
Yep, I made 28 of those blocks, just in case, since I didn't have a clue how they would be put together.  He kinda wanted a layout like above, but, that is way out of my math skills to make them that wonky. 

Connor wanted to design his own quilt top.  Well, the blocks were finished before the end of March 2012, but, with graduation activities going on, he didn't have time to sit down and start designing.  He left for the summer less than 10 days after graduation (he worked at a summer camp in another state), and only came home for a whole 3 days before he left for college.  So much for having time to design the quilt.  He finally agreed to let me start setting the blocks on point.  I didn't get very far before my trusty hand crank got tipped over, and didn't work properly anymore.  Eek!  I stink at fixing tension issues! 

From my previous post, you know that I attended the River Rat TOGA in September.  I took my 1959 Singer Spartan hand crank to the TOGA to see if someone could help me fix it.  I found out that it had multiple tension issues, but, after several wonderful sewing repair guys helped me, we finally got it up and stitching nicely again.  Yipee!    Now to get 'that' quilt finished. 

This quilt didn't like me!  Of course, it would have helped if I'd drawn out what I was trying to do, but, nope, that might have made sense, and made things easier, so, of course, I didn't do that.  I didn't think it would be that hard.  WRONG!  (did I mention that this quilt didn't like me???)  I've done more ripping out on this quilt than I've done in the past 2 years of sewing.  First, the blocks ended up a strange size (12" unfinished, 11.5" finished).  Then, I set them on point, not knowing how many blocks I would need, or how much sashing I would need to get this to a size that Connor wanted it to be.  That whole 'on point' thing with the odd size blocks was just too much for my math skills.  In the end, I mastered that quilt!  I won!  Here is the finished quilt top.

Connor's finished quilt top
Connor wanted things offset, and a bit wonky.  He didn't want a 'regular' quilt setting at all.  I couldn't do exactly what he wanted (too much math involved) but, I think I got the idea.  The corners are also offset.

bottom right corner (same as top, left corner)
bottom left corner (same as top, right corner)
Connor's quilt was pieced on this sewing machine.
1959 Singer Spartan hand crank (3/4 size machine)
The top quilt was pieced on my trusty Janome 4800QC.  I didn't collect vintage sewing machines back when that quilt was made.  The top quilt was hand quilted (by me), but, Connor's quilt will be quilted by a professional long arm quilter from one of my quilt guilds.  It will be finished by Christmas. 

Now to go figure out scrappy backing for this top.