Thursday, March 10, 2016

Sewing Chair

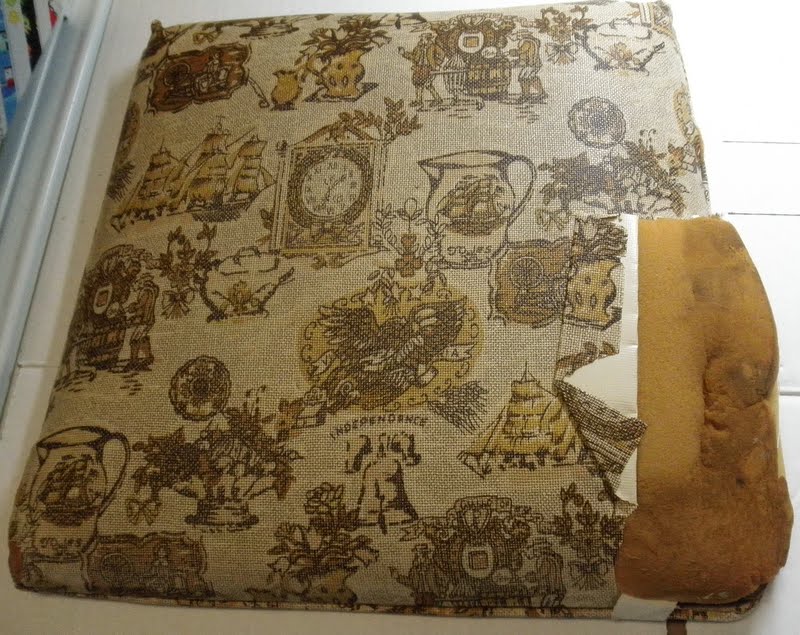
Last July, at the Michigan TOGA, I purchased a sewing chair.  I knew I wanted to recover it, but, I just haven't had the time to quilt the material.  Someone had recovered the cushioned parts in the past.  You can see the original vinyl around the bottom of the chair, under the cushion.
sewing chair, before re-covering

sewing chair, before re-covering
The vinyl that they used to recover the cushioned parts was starting to get sticky in places.  Vinyl does that sometimes, as it ages.

I knew when I bought this chair, that I wanted to use it for vintage machine demo's.  Well, I'm having a booth at my large quilt guilds quilt show this weekend.  I've been working on machines for days now, getting ready.  So far, I have 13 machines (including one treadle) ready to display, and several of my toy machines, too.  I still need to figure out the last machine to take (decisions, decisions).

Since I had most of my machines and projects ready, I decided to quilt the fabric for this chair.  I was going to quilt it at the show, if I had enough time.  Glad I didn't wait, since my treadle has been giving me fits with the tension.  I spent half of Wednesday, cleaning and adjusting the machine, trying to get the tension working nicely.  I finally gave up and just started quilting the material.  I wasn't worried about how it looked on the back, since I was covering a chair, not making a quilt to be seen on both sides.  All I did was quilt along the 'stitching' lines shown on the selvage fabric.  I love this faux selvage fabric!  Sew easy, none of the hard work of collecting and stitching the selvages together.

This is the treadle I quilted it on.
Post WWII Japanese treadle 'Victor'


I had already measured, and cut the pieces for the bottom/base of the chair and the back of the back rest.  Those pieces were only 2 layers, no batting.  I had also figured out how much fabric I needed for the 2 cushioned parts (seat and back rest).  That part had the batting in it.
fabric for the cushioned parts of the chair
I'd found this great fabric last year, and knew I wanted to use it on this chair.  I'd already purchased some, to make me a purse (still not made).  I purchased more of this fabric, for the chair.  It's Timeless Treasures.

As I quilted each piece, I started to attach it to the chair.  Not very easy, but, with my son's help, I got it covered, bit by bit.
base of chair

stapling it on

center part replaced

base recovered
I moved on to the seat back, next.
original vinyl covering

re-covered and braces attached

this part will be covered with the back cushion
Last fall, I purchased new foam for the cushioned parts of the chair.  I waited till Joann's had a sale.
new foam for cushioned parts
This is why someone had recovered the chair before.
what was underneath the vinyl covering
After cutting the cushion to fit the seat (not easy to cut thru 2" of foam), I lined up the quilted fabric (here is where you can see that the tension was off on the treadle).
underside of quilted fabric

it was hard to fold the corners with as little bulk as possible, using quilted fabric

finished seat cushion
The back cushion was last.
this part will be hidden

back cushion
Hubby had to help me re-assemble the chair.  It's hard to find the correct screw holes thru quilted fabric.  It's also hard to hold all the pieces by yourself.

Here is the finished sewing chair.
sewing chair, re-covered

I worked hard to get all the selvage stripes going the same direction

back of chair
This sewing chair will sit by my blue treadle, Victor, at the quilt show.  I think they will look nice together.


Tuesday, March 1, 2016

Celebrate International Craft Month & Giveaway


March is International Craft Month!  What a great excuse to craft and be creative everyday!

I've been being crafty on this project for a while now (I was slow on working on it).  My large quilt guild is having it's bi-annual quilt show March 12-13, 2016.  If you are near the Chicago area, please come check us out.  Pride of the Prairie Quilt Guild.  I'll be showing off several of my vintage sewing machines in the vendors area, so, come say 'Hi'.

Well, the guild has a challenge for each quilt show.  I decided to participate in the challenge this year.  We had to draw a quilt block out of a bag, then, figure out how to use that quilt block (tiny, to full sized) somewhere in our challenge quilt.  The maximum size for the challenge quilt is 20" square.

The block I drew was named 'Free Trade'.  All the blocks came from Patchwork Square.
Free Trade from Patchwork Square
I liked the name 'Free Trade', since quilters and crafters so often 'freely trade' their ideas to other quilters and crafters.  I decided to just make the block larger, and use my sewing themed fabrics to make the quilt.  This is the finished mini quilt.  It measures 19" square.
Free Trade mini quilt

up close of the hand quilting

showing backing
Since the faux selvage fabric is directional, I had to make extra Half Square Triangles, and fussy cut the squares.  That meant that I had extra HST's left over.  I decided to play around with them, and came up with a coaster and a mug rug.
coaster and mug rug
I have coasters all over my sewing room, and I love to have little mug rugs sitting next to my machine, so that notions don't slide around.  I made these this weekend, and I'm already using them.

For those of you who don't know me, I do most of my sewing on vintage, straight stitch sewing machines.  My favorite machine is my 1959 Singer Spartan (192K) that I converted to a hand crank.  These projects were stitched on this machine.
1959 Singer Spartan (192K) hand crank
Now, for the giveaway part.  Darlene, over at Quilt Shop Gal, has arraigned this little blog hop.  There are at least 19 different prizes, including Aurifil, books, patterns, scarves, doodling books, etc.  The complete list of prizes is on the Quilt Shop Gal blog.

Meanwhile, please check out all the other bloggers.  Everyone is posting today, so, just click thru the links, and see what everyone has been up to.

Marian - Seams to be Sew
Patty - Elm Street Quilts
Cheryl - You are already here ;)
Barb - Bejeweled Quilts by Barb
Vanda - Quilt in Peace
Julie - Pink Doxies
Carol - Fun Threads Designs
Carole - From My Carolina Home
Darlene - Quilt Shop Gal

a Rafflecopter giveaway


Don't forget to leave a comment and enter as many times as you can on Rafflecopter.


Saturday, February 27, 2016

Working on Ashley's Quilt

Another one of our nieces will be graduating this Spring.  I've been working on her quilt.  When I last posted about it, I guess I didn't make myself clear, and some people thought that I drew up this pattern.  Nope, I purchased a pattern, then re-drew it to fit my needs, as I frequently do.

This is the pattern I chose to make the quilt with.  I saw a sample at a local quilt shop back in early November.   I loved the sample, and figured that I could use the pattern.
Cosmic Jewels Revisited pattern
This pattern tells you how to make 4 different size quilts (wall, lap, queen, king), but, none of the sizes are what I need, since I need a twin size quilt, for a dorm bed.  I figured if I made the wall size and made it twice, I could turn it into a twin size quilt.  I re-drafted it (making the blocks slightly larger than the wall size blocks in the pattern).  Since it takes 8 different colors, besides the background, I needed to see what colors would look nice next to each other.  This is what I came up with.
my re-drafted version of the pattern
There is a great guide in the pattern, to help with the placement of each color.  They give you a grey guide, with numbers for the colors (1 thru 8).
great placement guide
I made a photocopy of this page, and used markers, so that I could put my colors in the correct places.
colored in placement guide
I finished the center of this quilt last night.
center of the twin size quilt top
When I purchased the pattern, I found a great border fabric.  I purchased the border fabric, then found the solids for the center of the quilt. 

I need to figure out which way I want to turn the border fabric now, so that I can add the borders.
top to bottom

side to side
Isn't that a great border fabric?  My sister-in-law told me bold and bright.  This is surely bold and bright! 

I've already made 2 pillowcases to go with this quilt.  My niece got one pillowcase for Christmas (not knowing anything about the quilt), and will get the other pillowcase when she gets the quilt.
can you guess which pillowcases go with this quilt?
I'm still trying to decide if I'm going to get this one quilted, or, if I'm going to quilt it myself, with straight lines. 

Check back with me on Tuesday for a 'Celebrate International Craft Month' blog hop, hosted by Darlene at Quilt Shop Gal.

Thursday, February 18, 2016

Meet my oldest and newest machine

The title makes you think that you'll be meeting 2 different machines, but, you'll only be introduced to one machine.  My 1880 Willcox & Gibbs chain stitch hand crank.
1880 Willcox & Gibbs chain stitch #A333474

before cleaning

W&G badge on back of machine
This is the oldest machine in my 'herd' of machines.  It is also my newest acquisition, since I purchased this machine in January (after the purple Featherweight). 

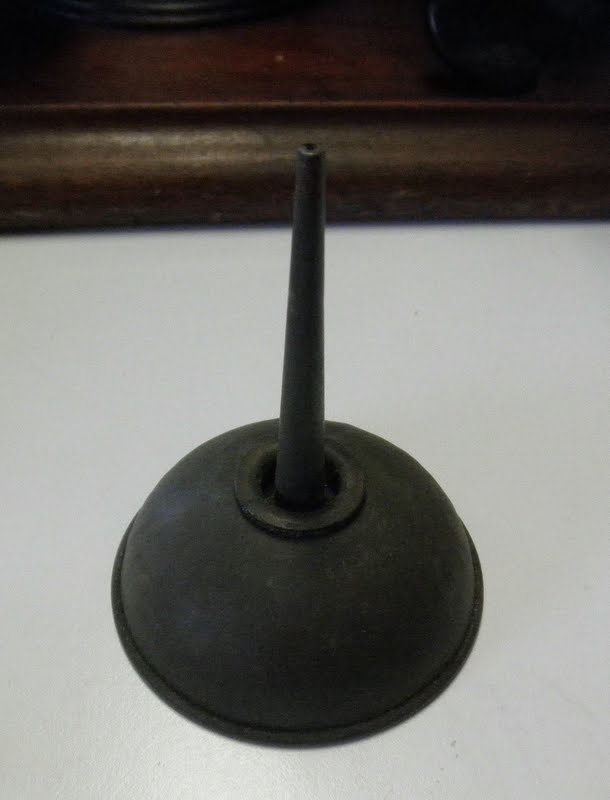
I've been getting some screws un-stuck on this machine, and, also cleaning up the wooden base.  Yesterday, I started cleaning this machine in earnest.   This machine came with some 'extra's.
attachments, needles, broken hand crank, etc.

original (and fragile) manual

oil can
I knew when I bought this machine that it was missing the spool pin, and that the hand crank was broken off.  I'll be meeting up with a lady who may have an extra spool pin in April.  She also knows how to repair the broken hand crank.  It's the same lady who found this machine for me (thanks Lisa)!
broken hand crank

where broken hand crank attaches
This machine is only missing small amounts of paint, despite it's age.  It has some paint missing on the hand wheel, and, where people grab it to pick it up.  It even has lots of its decals left.

Here is the Willcox & Gibbs, cleaned up.
front, cleaned up

back, where most of the decals are still intact

view of the hand crank attachment
Back in March 2010, my sons and I attended part of a Civil War re-enactment in Beggs, Oklahoma.  When we visited the encampment, I saw a lady sewing with a most unusual hand crank. I asked her about it, and, it was a Willcox & Gibbs chain stitch hand crank.  Her's was much older than mine is (I believe it was 1860's).  I fell in love with these machines then, but, it's taken me years to find one. 

Tuesday, February 9, 2016

A Few Things

My Birthday was last week, so, I've gotten a few fun things.

I have a Secret Sister at church.  I think she knows me well, can you tell?
sewing themed candle base (battery operated candle)

not only does it have 'sewing' items, but, it even has a boot, since I'm a born & bred Texan

this was the sticker on the card
Another friend also gave me some cool stuff.
coloring book and colored pencils

this card reminds me of my sewing room
She also gave me a cool, zipper bag, that is in the picture with the jelly roll strips that I won at Inchworm Fabrics.  Thanks Jeanette!
zipper bag (gift), and jelly rolls I won
Back in September, I found a sewing machine table.  At the time, I wasn't sure what machine it would fit.  I've since found out that it is a Singer 401 table, but, it will fit a Singer 301 short bed machine.  Both my Singer 301's are long bed machines (I do have a Singer 401, but, I haven't stitched much on it).  Well, a lady with a Singer 301 short bed machine traded beds with me (they just screw on and off).  She has the table for the Singer 301 long bed, and there was a gap, since her short bed didn't quite fit.  Well, now we are both happy.
Singer 301 with it's new short bed
We knew that the colors would probably be a bit 'off' but, that doesn't bother either of us.  Now I can use my table!  I was hoping that my new Featherweight would also fit in this table, but, I found out that the Featherweight is slightly wider than a Singer 301 or 401, so, it doesn't fit :(
Featherweight sits 'on' the table, not 'in' the table, oh well
I guess I'll just have to keep looking for a Featherweight table:)  I did get myself something for the Featherweight.  I've burned my hand 5 times now, on the light on the Featherweight.  I'm not used to machines with lights, and, this machine is shorter than my other machines, so, I keep hitting the light (Ouch)!  I found a LED bulb for Featherweights at Nova's Featherweights.  It shipped quickly.  Sorry that the picture is blurry.
new LED bulb
This bulb gets warm, but not HOT.  MUCH better!

I have been doing some stitching.  I've made lots and lots of half square triangles.
HST's
I'm making this pattern. 
top half of twin sized quilt (bottom will be the same as the top)
This is how far I've gotten so far today.
top corner(s) of pattern
I still have lots of stitching to go on this one.  It's for my nieces graduation, in the spring.